User Manual
Step 1: Access the Sign-Up page
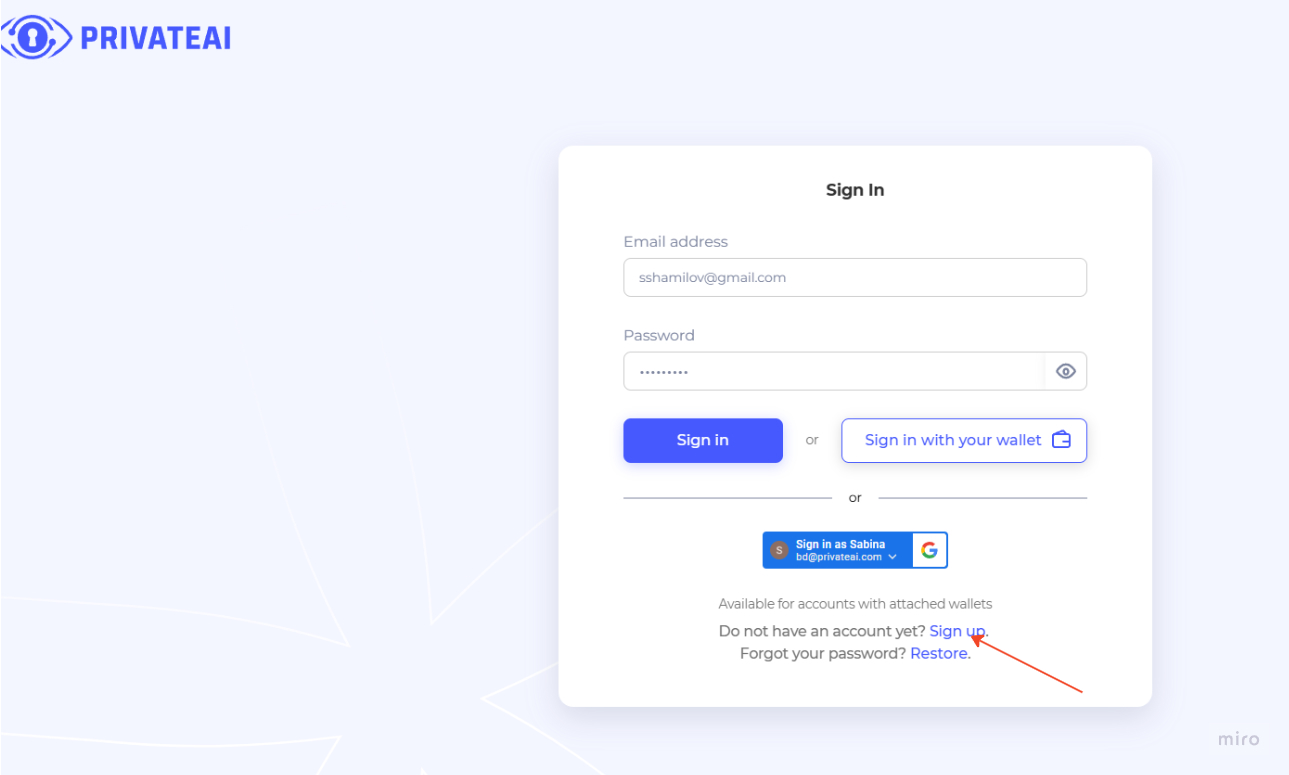
- Open your preferred web browser and navigate to https://demo.privateai.com/.
- On the page, locate and click the Sign Up button. This button is found at the bottom of white section of the page.
Step 2: Enter your email address and password
- A window will appear prompting you to enter your email address and password.
- In the Email Address field, type your valid email address.
- In the Password field, enter a strong password. Your password should be at least 8 characters long and include a mix of letters, numbers, and special characters.
- In the Confirm Password field, re-enter the same password to confirm it.
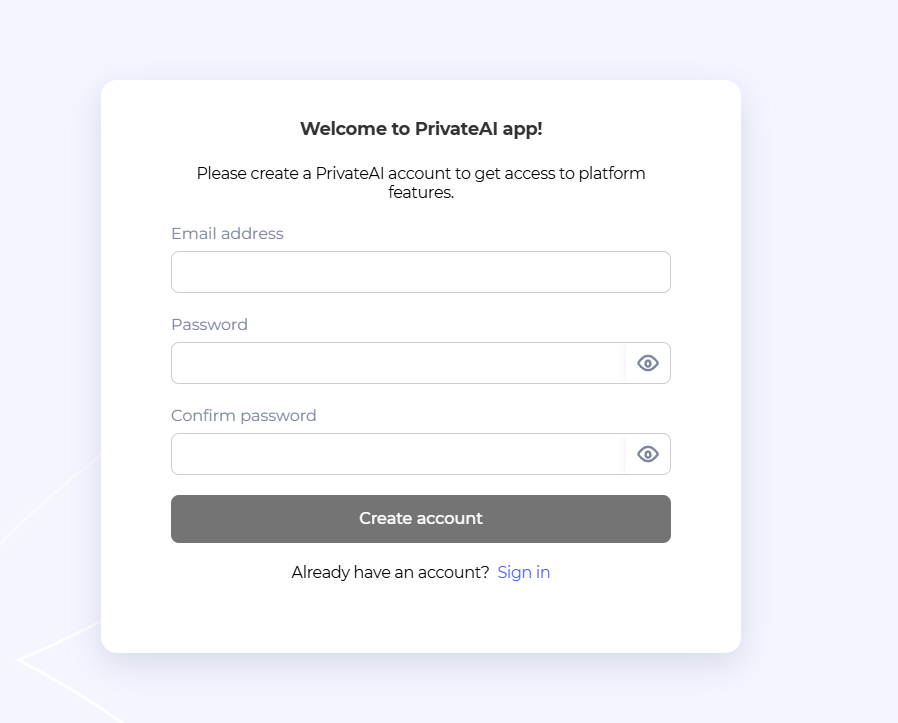
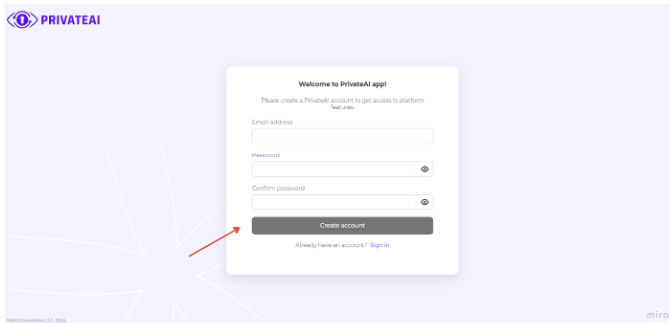
Step 3: Create your account
- After entering your email address and password, click the Create Account button.
- A message will appear informing you that a verification code has been sent to your email address.
Step 4: Check Your Email for the Verification Code
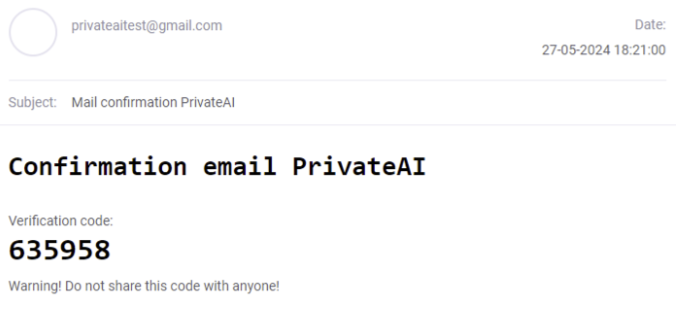
- Open your email inbox and look for an email from privateai@gmail.com with the subject "Mail confirmation PrivateAI".
- If you do not see the email in your inbox, check your spam or junk folder.
Step 5: Enter the verification code
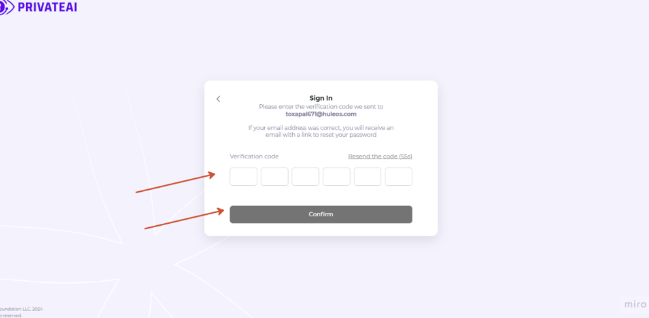
- Return to the sign-up page.
- In the Verification Code field, enter the code you received in your email.
- Click the Confirm button to complete the registration process.
Step 6: Registration complete
- Upon successful verification, you will be redirected to your new account profile with field to be filled in.
- You can now start using all the features and services offered by PrivateAI.com.
Troubleshooting tips
- Didn’t receive the verification email?
1. Check your spam or junk folder.
2. Ensure you entered the correct email address.
3. Click the "Resend" button on the sign-up page to receive a new code. - Verification code not working?
1. Make sure you entered the code exactly as it appears in the email.
2. Check if the code has expired and request a new one if necessary. - Forgot password?
1. Use the "Restore" button on the login page to reset your password.
Website navigation
Core sections of PrivateAI
After logging in, you will find several key sections on the website. Here’s an overview of these sections and their locations:
Left side menu
The left side of the page contains the main navigation menu, which includes the following sections:
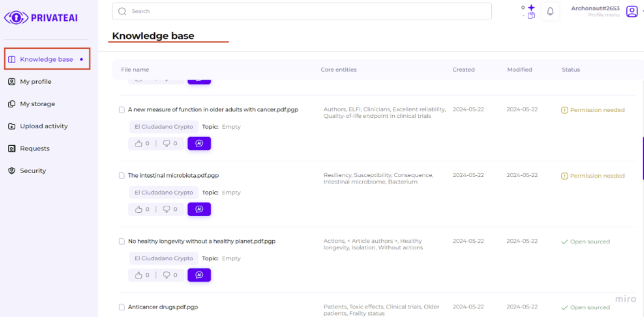
- Knowledge base
- Description: Access a comprehensive repository of articles uploaded by the platform users.
- Usage: Click on this section to search for, request access and read articles that provide answers to your questions and detailed information on various topics.
- My profile
- Description: View and edit your personal information and account settings.
- Usage: Click here to update your profile details, such as your name, email address, and other personal information.
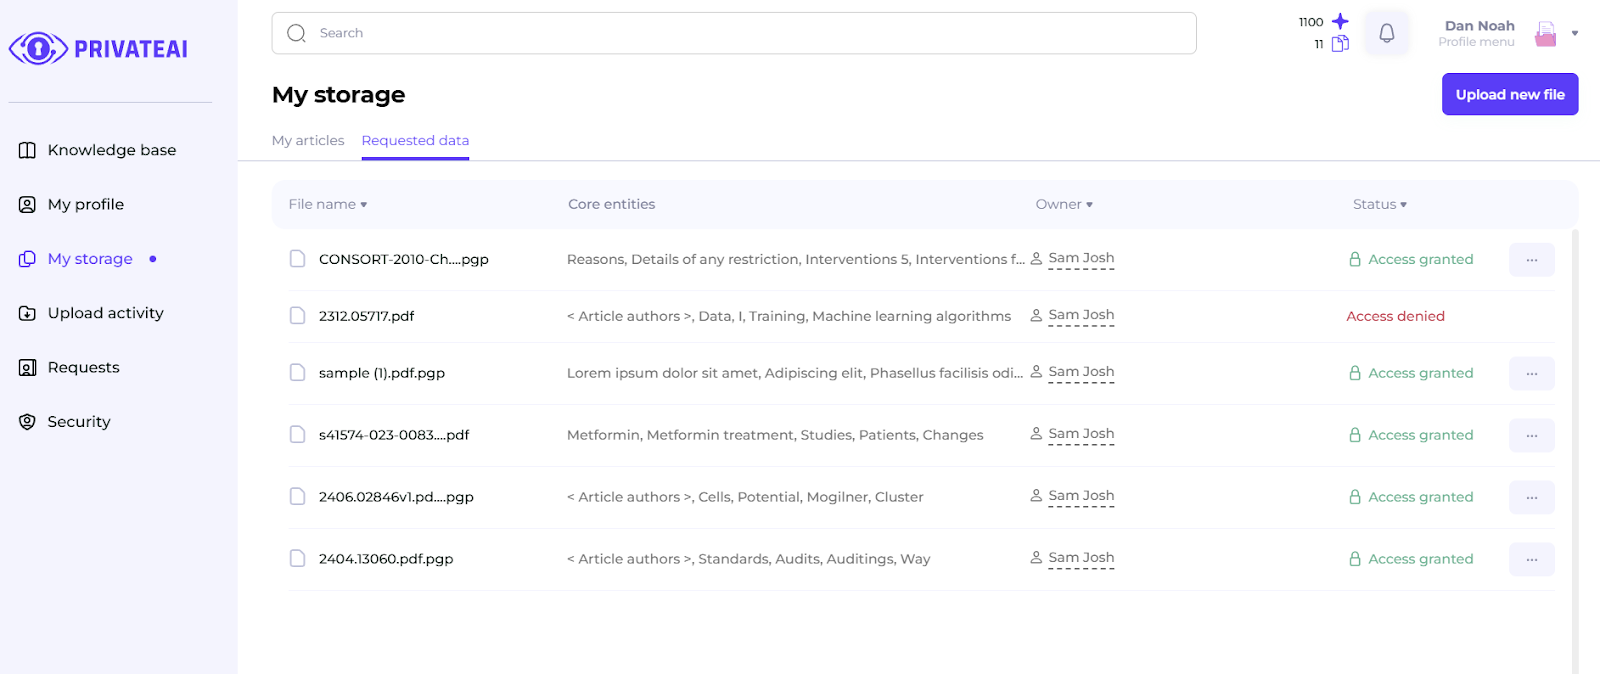
- My storage
- Description: Manage and organize your uploaded documents and files, track your requests.
- Usage: Use this section to view, sort, and organize all the files you have uploaded to the website and see which of your paper access requests has been approved or declined.

- Upload activity
- Description: Track your document upload history and status.
- Usage: Check this section to monitor the status of your uploads, see the history of your activities, and ensure all documents are correctly processed.
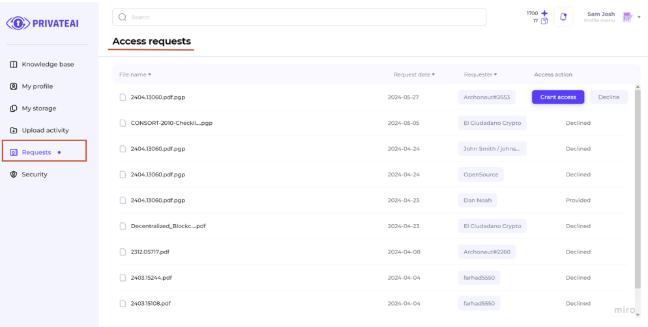
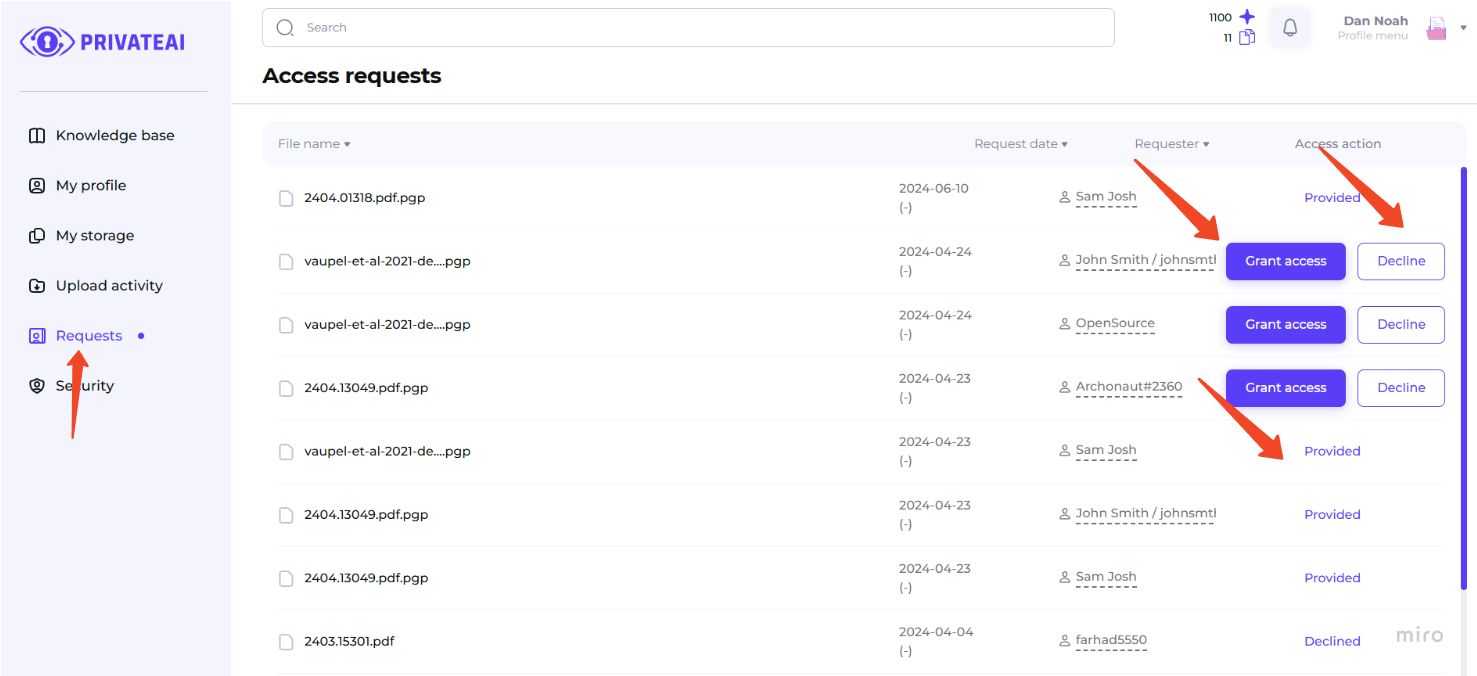
- Requests
- Description: Manage your documents access requests or inquiries.
- Usage: Visit this section to grant access based on the user requests.
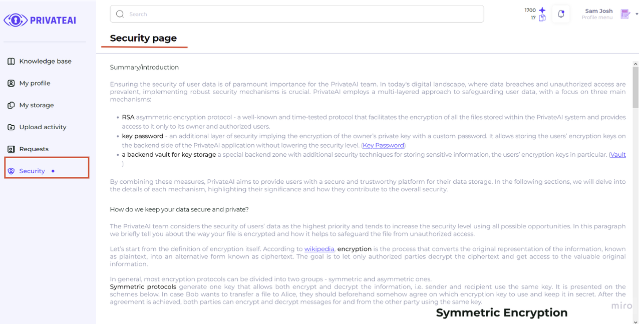
- Security
- Description: Learn about how the platform keeps your data secure and private and understand the role of the key password.
- Usage: Click here to understand what the platform security practices are, how the data privacy is handled, and what is the key password.
Top part of the page
The top part of the page contains additional features and counters that provide quick access to important functions and information:
- Search bar
- Description: Perform searches through the Knowledge Base for quick access to information.
- Usage: Type keywords or phrases into the search bar to find relevant articles and resources in the Knowledge Base.
- Rewards counter
- Description: View your accumulated rewards points or badges.
- Usage: Check this counter to see how many rewards points or badges you have earned through your activities on the website.
- Uploaded documents counter
- Description: See the total number of documents you have uploaded.
- Usage: This counter displays the total count of your uploaded files, providing a quick overview of your contributions.
- Notifications
- Description: Check for alerts and messages about your account or activity on the website.
- Usage: Click on the notifications icon to view recent alerts, updates, and messages relevant to your account.
- Profile settings
- Description: Access settings for your profile with options to view or edit your account details.
- Usage: Click on the arrow near your profile picture at the top right corner to access and modify your account settings or Log Out from the account.
Password restoration
If you have forgotten your password or need to restore access to your account, follow the steps below to reset your password on demo.privateai.com.
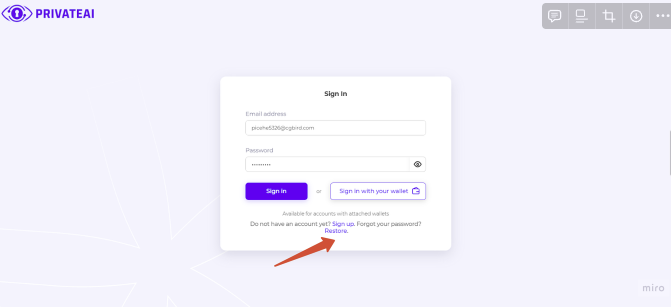
Step 1: Click the restore button
- On the Sign-In page, locate and click the Restore button.
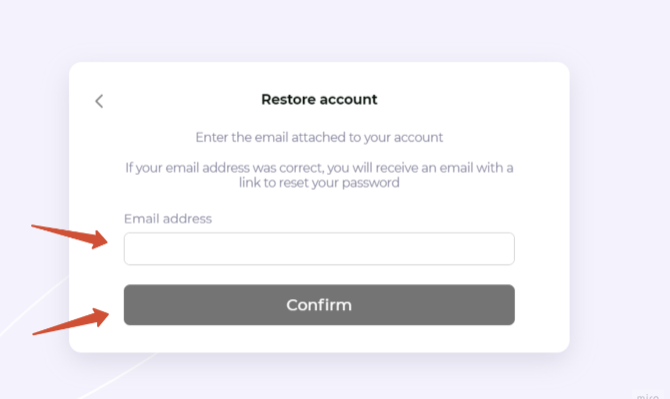
- You will be redirected to a new window titled Restore Account.
- In the Email Address field, enter the email address associated with your account.
- Click the Confirm button.
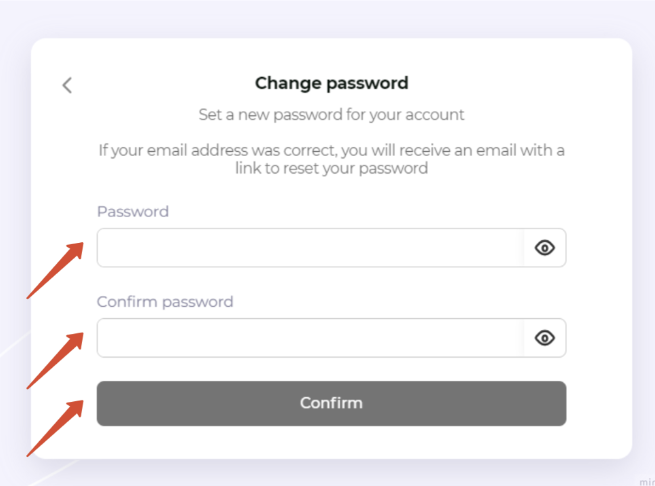
Step 2: Set a new password
- After confirming your email address, you will be redirected to another window with two input fields: Password and Confirm Password.
- In the Password field, enter a new password. Your password should be at least 8 characters long and include a mix of letters, numbers, and special characters.
- In the Confirm Password field, re-enter the same password to confirm it.
- Click the Confirm button.
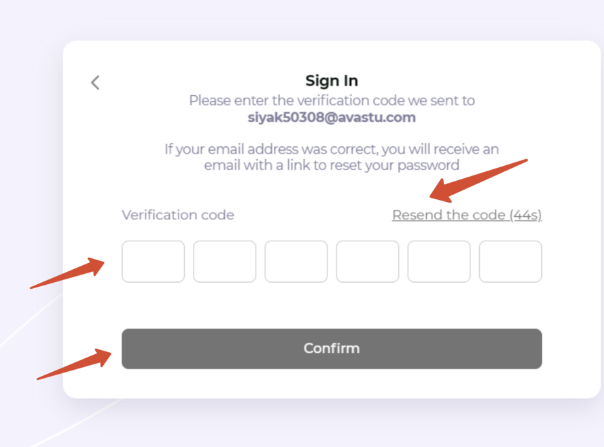
Step 3: Enter the verification code
- After confirming your new password, a verification code will be sent to your email address.
- Check your email inbox for the verification code. If you do not see the email, check your spam or junk folder.
- Return to Sign In window where you will see a field to enter the verification code.
- Enter the verification code you received in your email.
- Click the Confirm button to complete the password restoration process.
- If the verification code is correct, your password will be successfully reset.
- You can now use your new password to sign in to your account.
💡 Note:
The verification code expires in 60 seconds. You must enter the code within this time frame. If you do not enter the code within 60 seconds, you will need to click the Resend the Code button to receive a new verification code and restart the process from step 3.

Troubleshooting tips
- Didn’t receive the verification email?
- Check your spam or junk folder.
- Ensure you entered the correct email address.
- Click the "Resend the Code" button on the verification window to receive a new code.
- Verification code not working?
- Make sure you entered the code exactly as it appears in the email.
- Check if the code has expired and request a new one if necessary.
User profile
This manual provides a comprehensive guide on how to access, view, and edit your user profile on demo.privateai.com. Your profile contains important information about you and allows you to manage various personal details.
Accessing your profile
To view or edit your profile, you must be registered and logged in to the platform. There are two main points from which you can access your user profile:
Access via left sidebar
- Navigation: Locate the left sidebar of the page, which remains constant across the platform.
- My Profile: Click on the My Profile section.
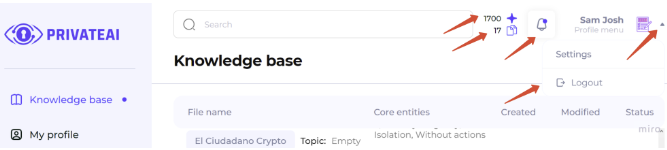
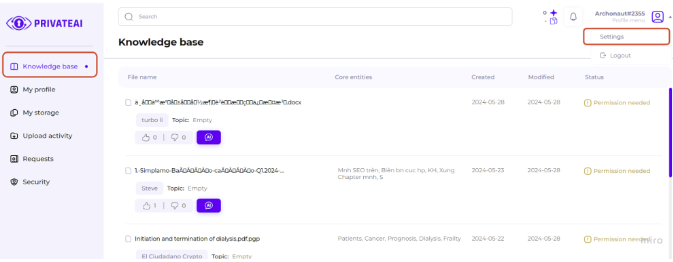
Access via top right corner
- User icon and nickname: In the top right corner of the page, you will see your user nickname, an icon, and a dropdown menu.
- Dropdown menu: Click on the dropdown menu next to your nickname.
- Settings: Select the Settings option from the dropdown menu. This will take you to the same page as the My Profile section in the left sidebar.
- Logout: Alternatively, you can select the Logout option from the dropdown menu to log out of the platform.
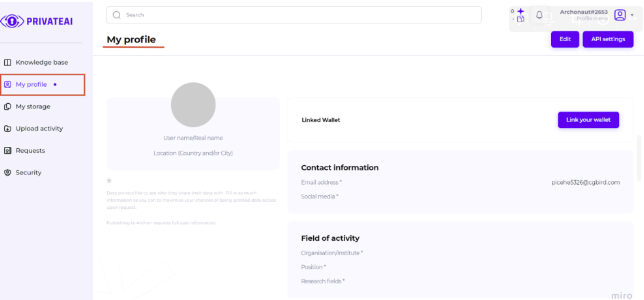
Profile details
Your user profile contains the following information:
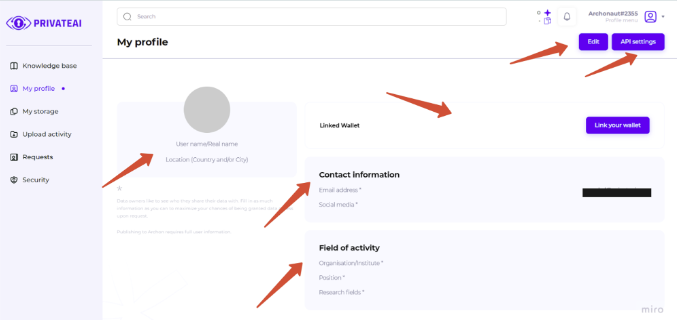
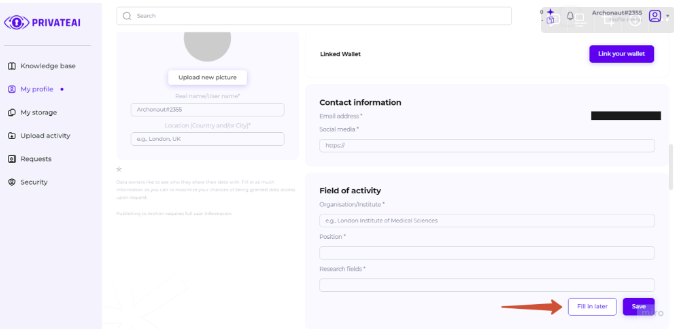
The use profile information can be updated or changed by clicking on the Edit button on the top right corner of “My profile” page
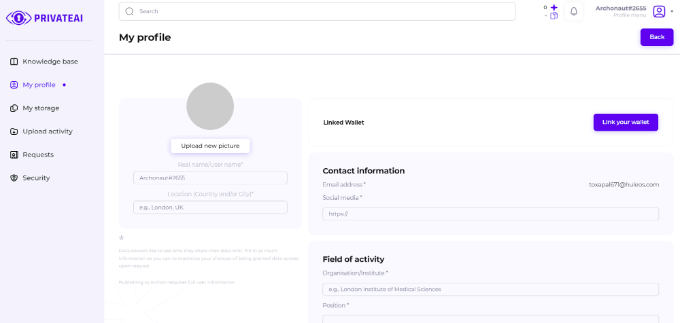
Profile picture
- Description: A visual representation of you.
- Editing: Click on the “Upload new picture” button to upload a new one.
Username
- Description: Your unique identifier on the platform.
- Editing: Can be changed in edit mode.
Location
- Description: Your geographical location.
- Editing: Can be updated in edit mode.
Linked wallet
- Description: The digital wallet linked to your account.
- Editing: Can be modified by clicking on “Link your wallet” button.
Contact information block
- Email Address: The email associated with your account.
- Social Media: Links to your social media profiles.
- Editing: Both email and social media links can be updated in edit mode.
Field of activity block
- Organization/Institute: The organization or institute you are associated with.
- Position: Your role or position within the organization.
- Research Fields: Areas of research or work that you are involved in.
- Editing: All fields in this block can be updated in edit mode.
Editing your profile
To edit your profile details:
- Enter edit mode by clicking on the “Edit” button on the top right side of “My profile" page.
- Modify details and click on the “Save” button to save the changes or on “Fill in later” to exit edit mode without saving the changes.
Logging out
To log out of the platform:
- Dropdown menu: Click on the dropdown menu next to your user nickname in the top right corner.
- Logout option: Select the Logout option from the dropdown menu to log out of your account.
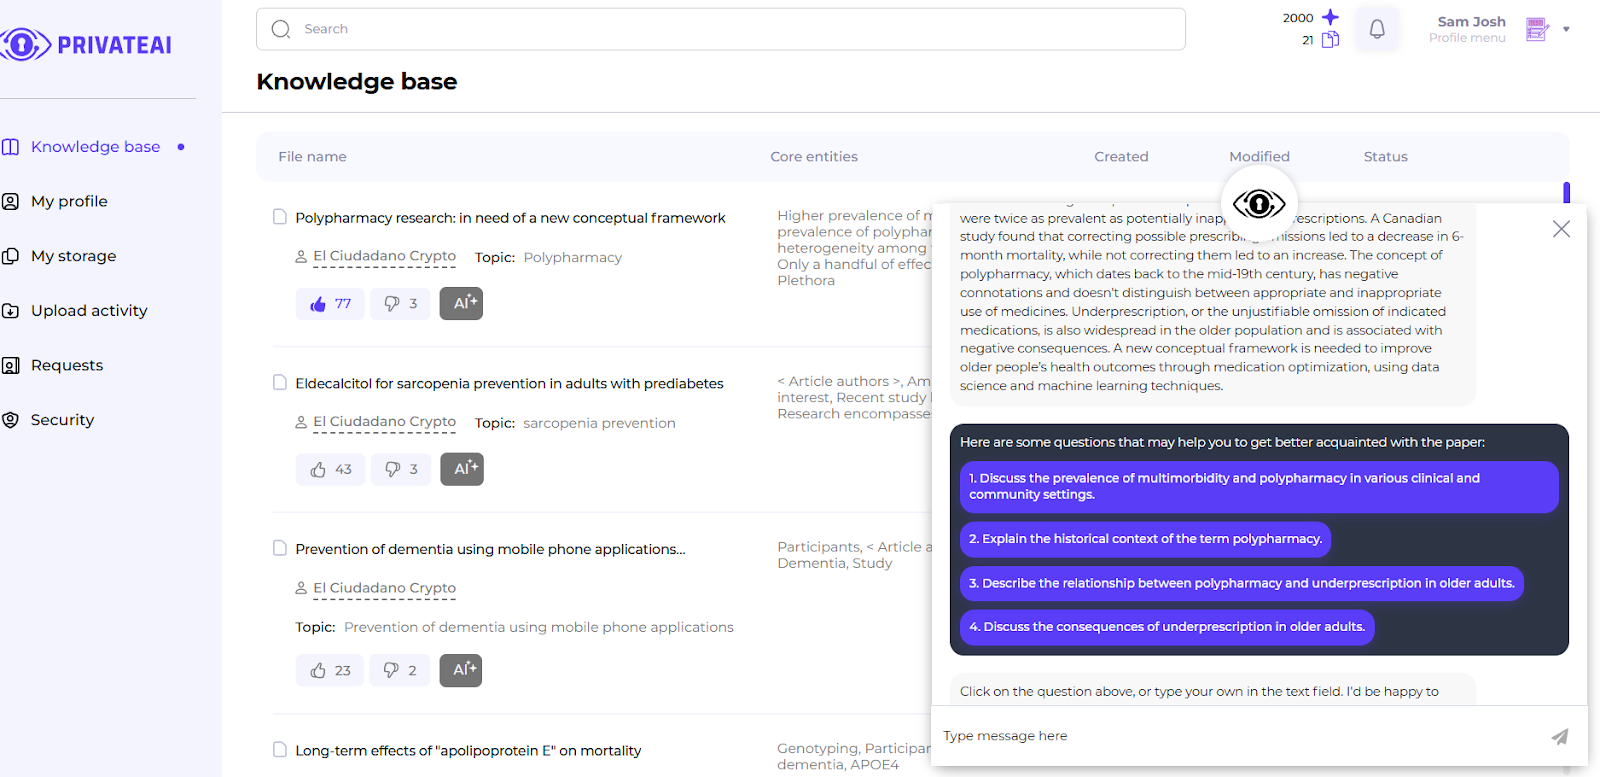
Knowledge base search
This manual provides a step-by-step guide on how to perform a search within the Knowledge Base, which is a collection of documents uploaded by users. Authorized users can easily search for information using keywords.
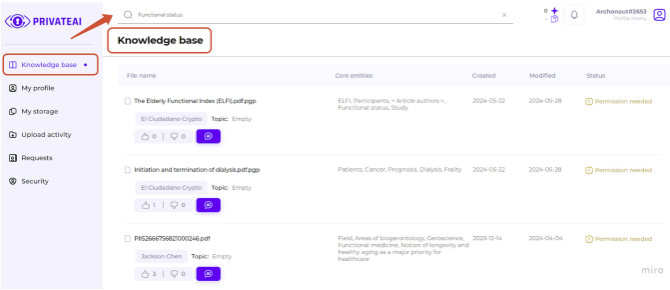
Step 1: Access the knowledge base
- Ensure you are logged in to your demo.privateai.com account.
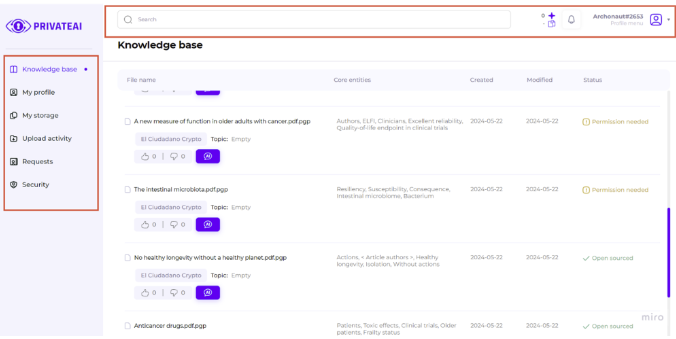
- At the top of the Knowledge Base section, you will find a search input field. This is where you will enter your search keyword.
- Click on the search input field to activate it.
- Type in the keyword related to the topic, author, or Core Entities of the document you are looking for.
- After entering the keyword, press Enter on your keyboard to initiate the search process.
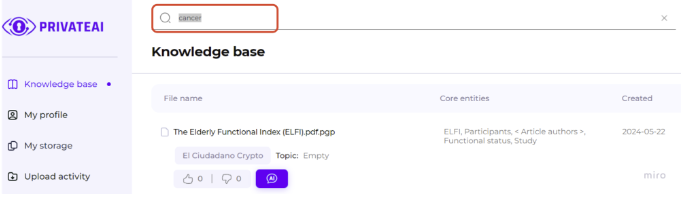
Step 2: View search results
- The system will search through the Knowledge Base, scanning the topic, author, and Core Entities of the uploaded documents.
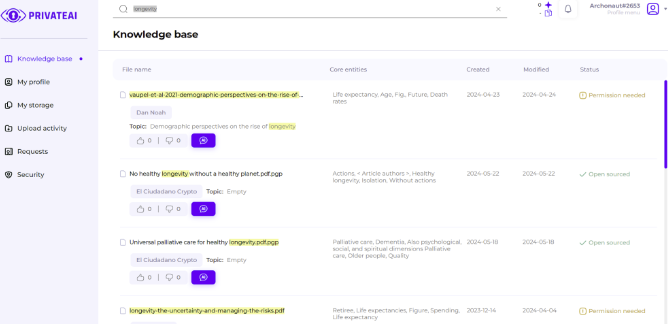
- The search results will be displayed on a page, with the keyword you entered highlighted in the results list.
- Browse through the list of documents that match your search keyword.
- Click on any document title to view more details and read the content.
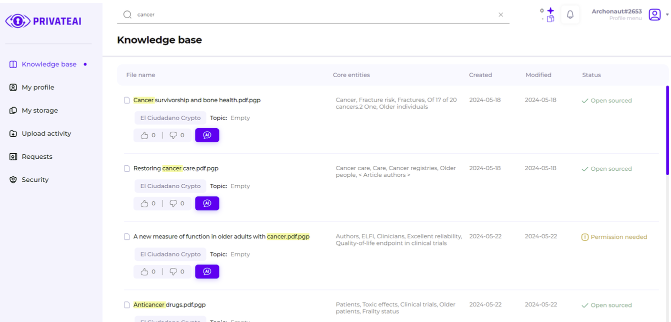
Example search scenario
- User action: Enter the keyword "Longevity" in the search input field and press Enter.
- System response: The Knowledge Base searches through all documents for occurrences of "Longevity" in the topic, author names, and Core Entities.
- Result: The search results page displays a list of documents with "Longevity" highlighted in the titles or content snippets.
Tips for effective searches
- Use specific keywords: Enter specific terms related to your query to get more accurate results.
- Try different variations: If you don't find what you're looking for, try different keyword variations or related terms.
- Check highlighted keywords: The highlighted keywords in the search results can help you quickly identify relevant documents.
Troubleshooting tips
- No results found:
- Double-check the spelling of your keyword.
- Try using broader or different keywords.
- Too Many Results:
- Use more specific or additional keywords to narrow down the search results.
How to connect a wallet to an account.
Welcome to the MetaMask Wallet Connection Manual! This guide will walk you through the process of connecting your MetaMask wallet to your user account and selecting the Sepolia test network or any other network, the procedure is the same. MetaMask is a popular and secure digital wallet that allows you to interact with the Ethereum blockchain and its various networks. By following the steps in this manual, you'll be able to easily connect your wallet and start using it for processing documents on demo.privateai.com.
In this manual, we will cover:
- Installing MetaMask: How to add MetaMask to your browser or mobile device.
- Creating and Setting Up Your Wallet: How to create a new wallet and secure it.
- Connecting Your Wallet to Your http://demo.privateai.com/
- User Account: How to link your MetaMask wallet to your account on our platform.
- Adding Sepolia Network (sample network): How to configure MetaMask to connect to the Sepolia test network.
Let's get started by ensuring you have MetaMask installed and set up on your device. All the details you need are explained in the sections below.
Part 1: Registering for MetaMask
Step 1: Install MetaMask
- Install MetaMask extension:
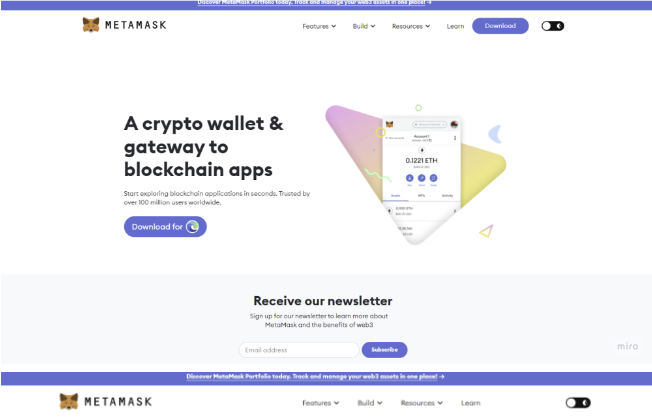
- Official website: You can install the MetaMask extension directly from the MetaMask website. The website automatically detects your browser and suggests the relevant extension to download.
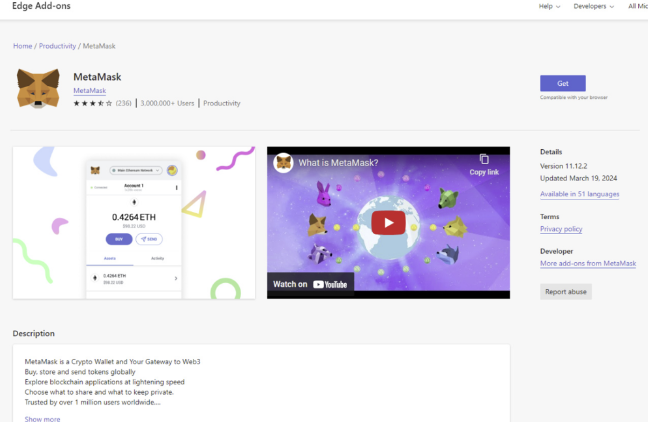
- Chrome: Alternatively, go to the Chrome Web Store and search for "MetaMask". Click on "Add to Chrome" and then "Add Extension".
- Firefox: Go to the Firefox Add-ons page and search for "MetaMask". Click on "Add to Firefox" and then "Add".
- Other Browsers: Visit the MetaMask Download Page for other supported browsers and follow the installation instructions.

Step 2: Create a MetaMask account
- Open MetaMask:
- Click on the MetaMask icon in your browser toolbar to open the extension
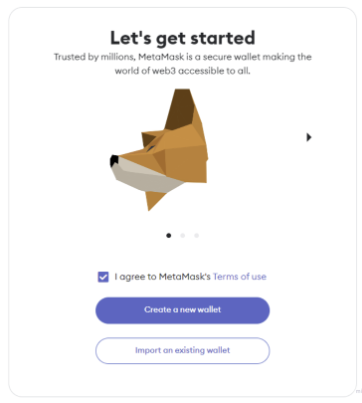
- Click the Get Started button.
- Create a wallet:
- Click on Create a Wallet.
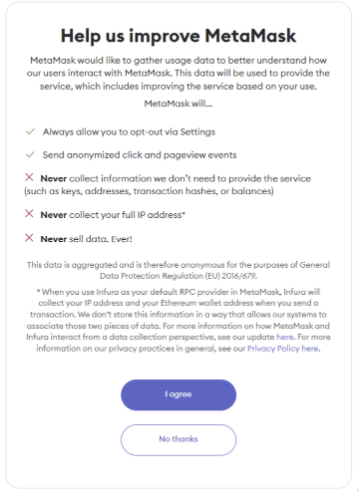
- You will be prompted to agree to MetaMask's terms and conditions. Click I Agree.
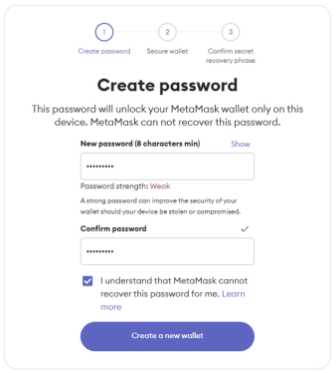
- Enter a strong password for your MetaMask wallet. Confirm the password and click Create.
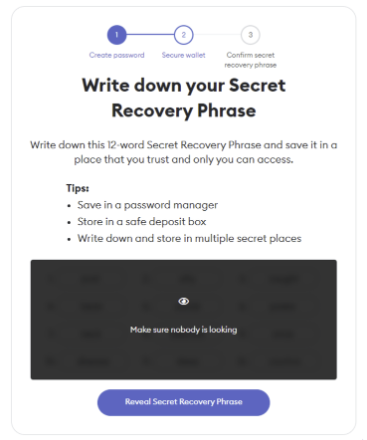
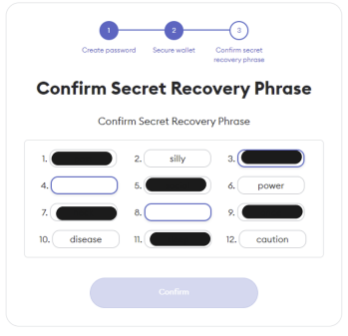
- MetaMask will provide you with a Secret Backup Phrase. This phrase is crucial for recovering your account if you forget your password or lose access to your wallet.
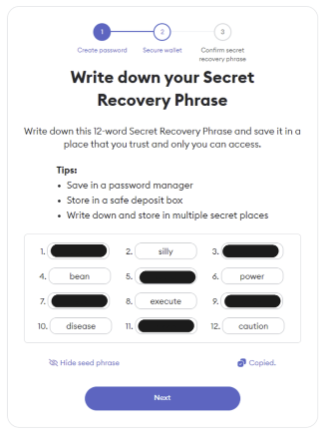
- Write Down Your Secret Backup Phrase: Write down the phrase and store it in a secure location. Do not share this phrase with anyone.
- Confirm Your Secret Backup Phrase: Follow the on-screen instructions to confirm your phrase.
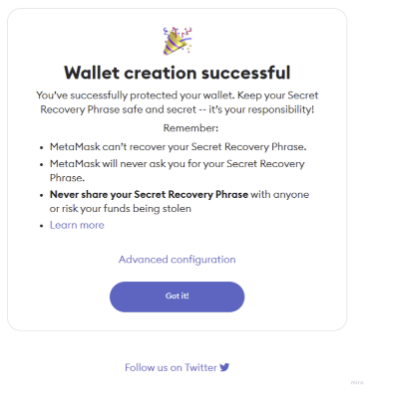
- Once you have confirmed your Secret Backup Phrase, click All Done. Your MetaMask wallet is now set up.

Part 2: Adding Sepolia Network (sample TestNet) to MetaMask
Step 1: Access MetaMask settings
- Click on the MetaMask icon in your browser toolbar to open the extension.
- Click on the account icon (circular icon at the top right) to open the account menu.
- Select Settings from the dropdown menu.
Step 2: Add Sepolia Network
- In the Settings menu, click on Networks.
- Click the Add Network button.
- Enter Network Information:
- In the "Add a network" screen, enter the following details for the Sepolia network:
1. Network Name: Sepolia Test Network
2. New RPC URL: https://rpc.sepolia.org
3. Chain ID: 11155111
4. Currency Symbol: ETH
5. Block Explorer URL: https://sepolia.etherscan.io
- Click the Save button to add the Sepolia network to MetaMask.
Step 3: Switch to Sepolia Network
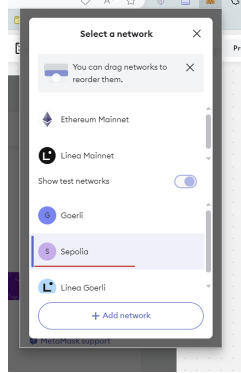
- Switch Network:
- Click on the network dropdown at the top of the MetaMask window.
- Select Sepolia Test Network from the list of networks.
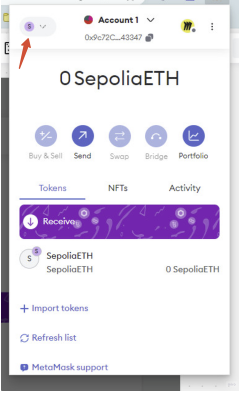
You have successfully registered for a MetaMask account and added the Sepolia network. You can now use MetaMask to interact with the Sepolia test network and perform activities on the PrivateAI platform.
💡 Important Note: In the future it can be any other TestNet, for example BNB Chain, in order to change the TestNet, you just go to extension window of the browser and add any other TestNet.
Part 3: Connecting wallet to PrivateAI user profile
Step 1: Access my profile section
- Ensure you are logged in to your PrivateAI account.
- Click on the My Profile section located in the left sidebar of the page.
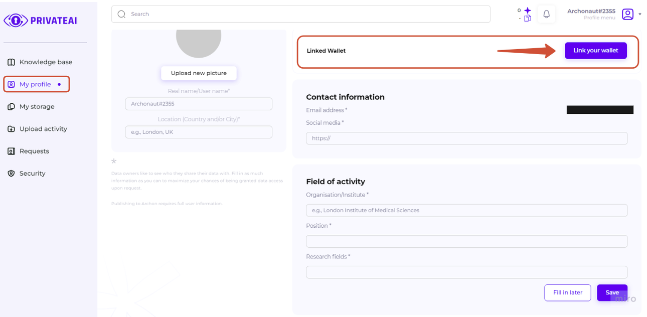
- In the My Profile section, find the block titled Linked Wallet.
- Click on the Link your wallet button near the title.
Step 2: Connect with MetaMask
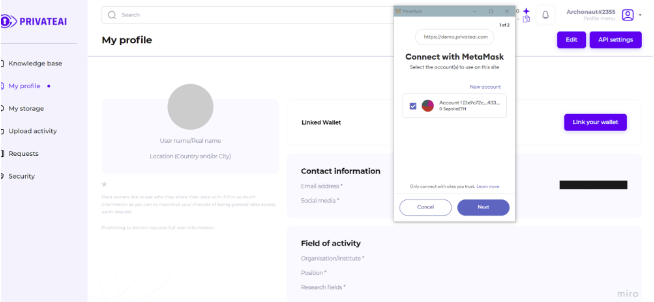
- After clicking the button, the MetaMask browser extension window titled Connect with MetaMask will automatically open.
- In the MetaMask window, select the account you want to link.
- Click the Next button to proceed.
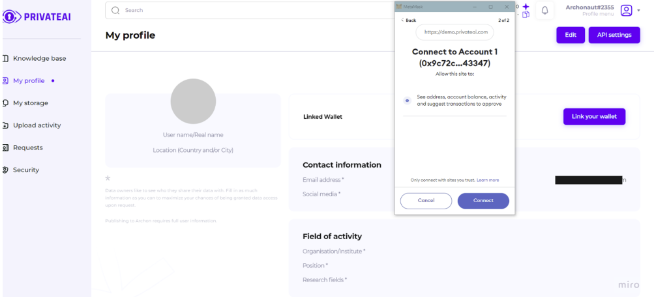
- You will be directed to the next MetaMask window titled Connect to [Account].
- Click the Connect button.
- After connecting, click the Sign button to authorize the connection.
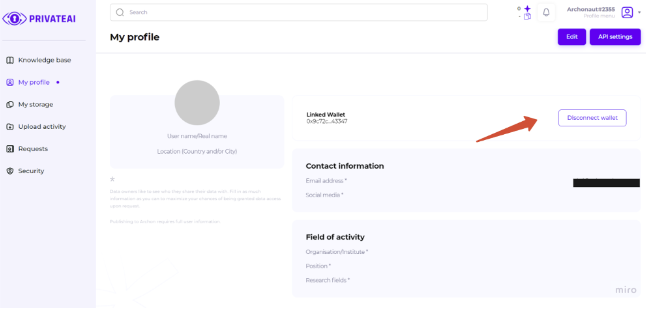
- Once the wallet is connected, you will see the wallet details under the Linked Wallet section in your profile, displayed in a hidden format for security.
- A Disconnect wallet button will be available, allowing you to disconnect the wallet from the PrivateAI platform at any time.
💡 Important Note: The network can be changed and the charges can occur for document upload.
Troubleshooting tips
- MetaMask Not Opening:
1. Ensure the MetaMask extension is installed and enabled in your browser.
2. Check that you are logged into MetaMask. - Connection Issues:
1. Verify that you are using the correct MetaMask account.
2. Ensure you are connected to required network in MetaMask.
PrivateAI ecosystem uses MetaMask for
- Secure Storage: It securely stores your private keys, which are like secret passwords that give you access to your cryptocurrencies. Only you should know your private keys.
- DApp Interaction: It allows you to interact with decentralized applications (DApps) or just store your digital assets securely.
- Ecosystem Access: It acts as a bridge to the decentralized world, allowing you to easily interact with various DApps and smart contracts on the Ethereum network.
Now you can download, request access and view documents by signing.
Uploading documents to platform
Introduction
This manual provides a detailed guide on how to upload documents to the PrivateAI platform. It outlines the steps from ensuring you are authorized to handling upload limits and managing document availability.
Prerequisites
- Authorization: Ensure you are logged in to the PrivateAI platform.
- Wallet Connection: You must have a wallet connected to your profile to upload documents.
Uploading documents
Step 1: Accessing Upload Options
You have two options to start uploading your documents:
Option 1: My storage section
- From the left sidebar, click on the My Storage section.
- Click on the Upload new file button located at the top right side of the page.
- This action will redirect you to the Upload activity section.
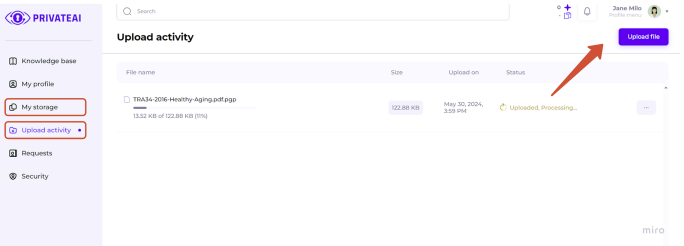
Option 2: Upload activity section
- From the left sidebar, click on the Upload activity section.
- Click on the Upload file button.
Step 2: File selection and upload limit notification
- Clicking the Upload file button will open a dialogue box for file selection.
- Choose the file you want to upload from your device and confirm the selection.
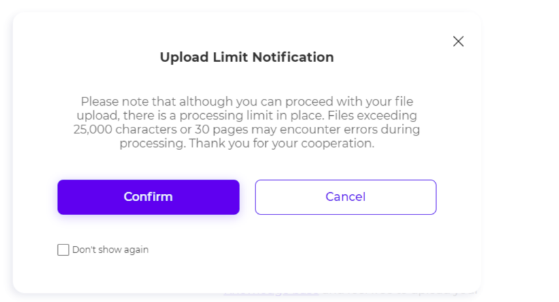
- After selecting the file, a prompt box titled Upload Limit Notification will appear with:
1. Message: “Please note that although you can proceed with your file upload, there is a processing limit in place. Files exceeding 25,000 characters or 30 pages may encounter errors during processing. Thank you for your cooperation.”
2. Checkbox: Optionally, check the box to hide this message for future uploads.
3. Buttons: Click on the Confirm button to proceed with the upload or click Cancel to abort the upload.
Step 3: Document processing
- After confirming the upload, the document will start processing. The status will show as Uploaded, Processing....
- Once the processing is complete, the status will change to Uploaded.
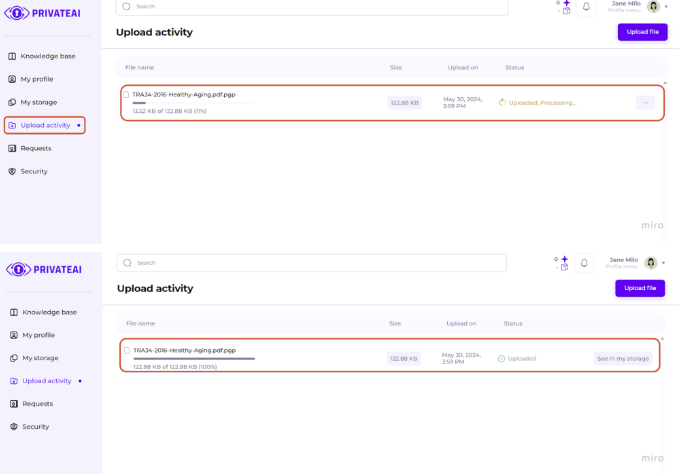
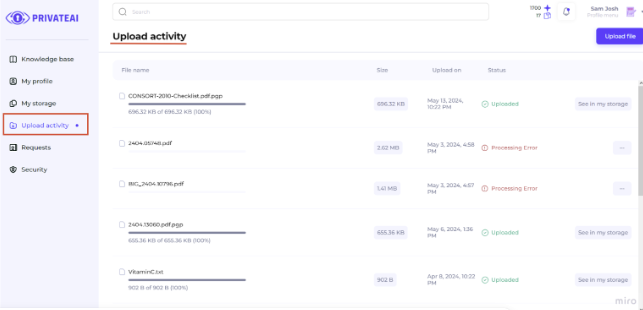
Step 4: Viewing uploaded document
- You can see the record of the uploaded document in the Upload activity section with details such as file name, file size, date of upload, status, and a See in my storage button.
- Click the See in my storage button to be redirected to the My Storage section where the document is listed.
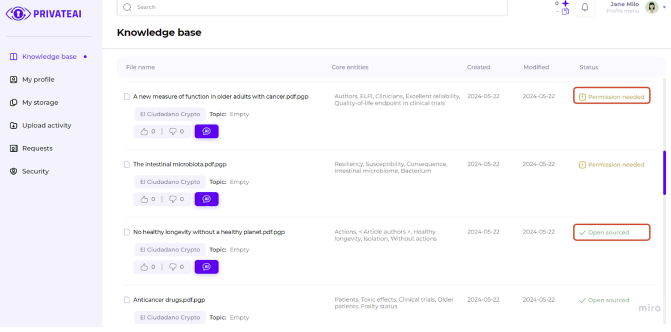
Step 5: Managing document availability
- Once uploaded, the document will be visible in the Knowledge Base and ready to be published and viewed.
- To restrict access, locate the lock icon on the uploaded document record under the Availability title.
- Click on the lock icon to open a dropdown menu with two options and select one of them:
1. Open-sourced: Make the document available to everyone.
2. Permission-based: Restrict access to specific users (users will have to request access).
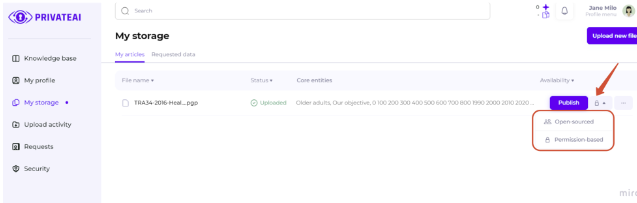
As a result, the document will be listed in Knowledge Base with the appropriate permission and will be indexed for the search.
Troubleshooting tips
- Wallet not connected:
1. Ensure your wallet is connected to your profile, or you will not be able to upload documents. - Upload errors:
1. If you encounter errors with files exceeding 25,000 characters or 30 pages, consider splitting the document into smaller parts.
Document related activities on platform
This manual provides a detailed guide on what can be done with uploaded user documents on the PrivateAI platform.
Viewing documents
Two options for viewing documents
- Your own documents:
1. You can view documents you have uploaded in the My Storage section. - Other users documents:
1. You can view other users' documents in the Knowledge Base or by using the search feature, depending on the document's access permissions.
Viewing and editing your own documents
- From the left sidebar, click on the My Storage section.
- All your uploaded documents are listed here.
- Document Actions:
1. You can perform various actions on your documents:
- View: Open and see the document details and generated Knowledge Graph.
- Edit: Modify the document content by clicking on the Edit button under the document details.
- Delete: User is able to delete the uploaded document, and no record will be left on the platform.
- Download: Download the PDF or Knowledge Graph’s table structure in XLSX format.
- Change permissions: Permission-based (user has to grant access) or Open-sourced (any user has access to the document).
- Comment: Leave comments on your document.
- Publish: Make your document available to others.
- Get Bonuses: Earn rewards for each uploaded and published document.
- Use AI Assistant: Ask questions related to the document context.
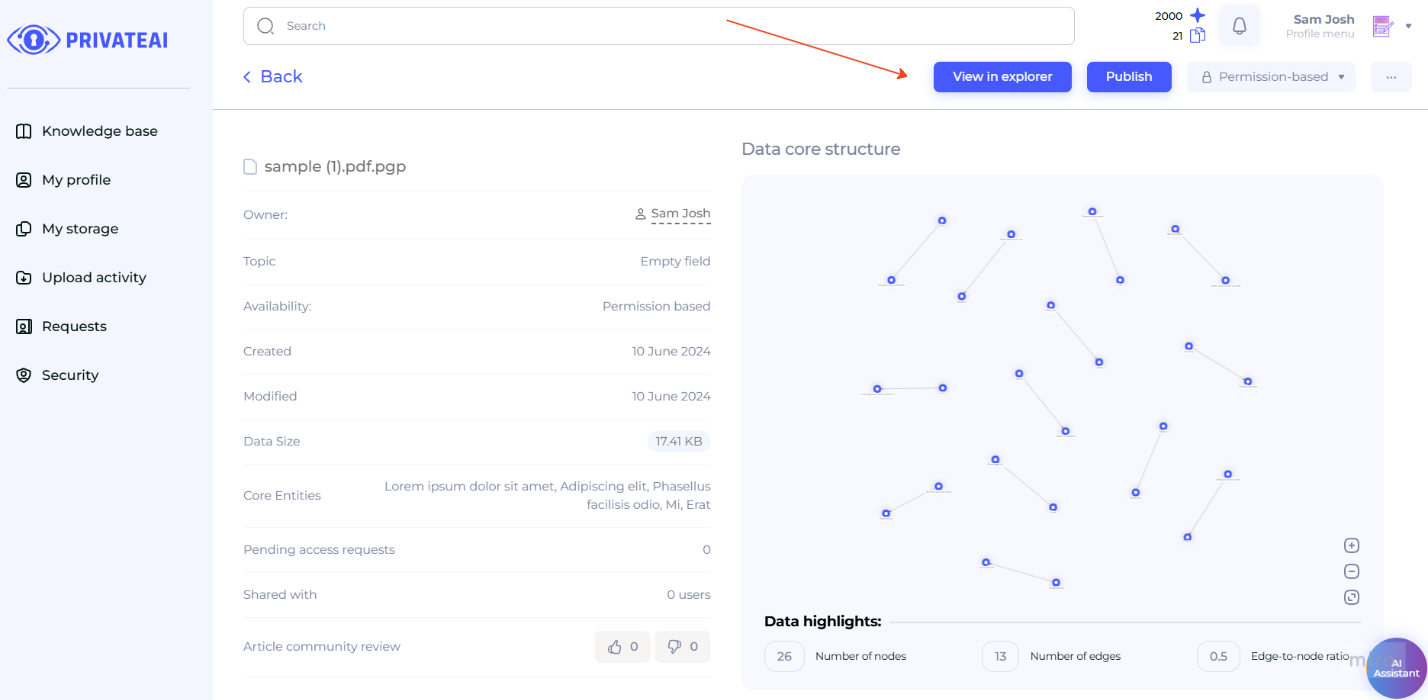
- View in explorer: This feature has hash records in blockchain and gives you the track of the document. It has record when the document is published, on grant access.
To switch to edit mode of your own document, you select the document and click on Edit button and you can now edit the detail of the document.
The next section covers the five core sections of the document: Document Details, Data Core Structure, AI Assistant, Top Sub Menu of Document Page, and Comments.
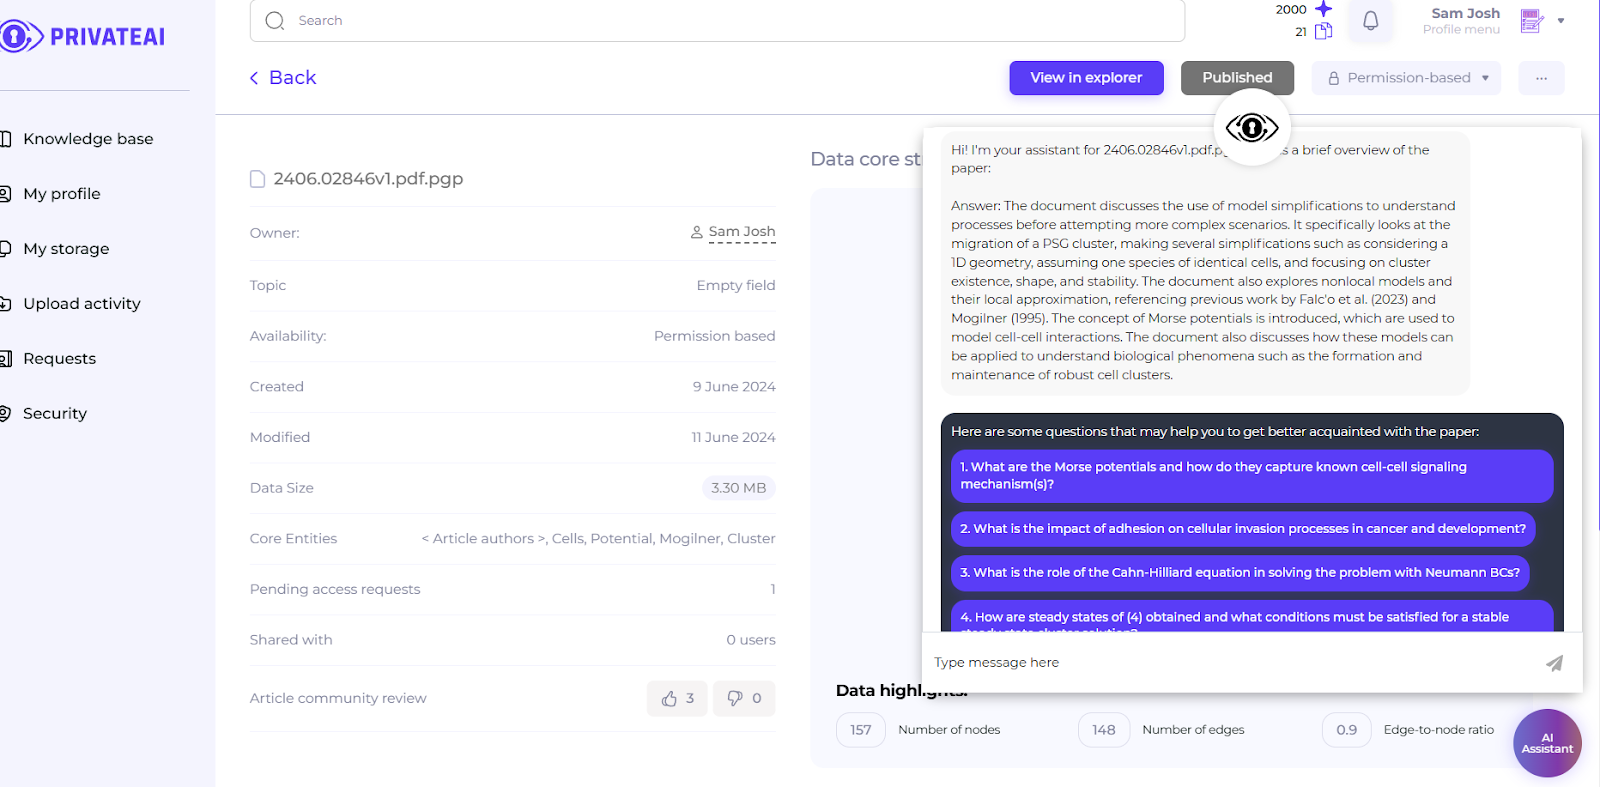
1. Document details
The Document Details section contains comprehensive information about the document:
- File Name: The name given to the document at the time of upload. It has a PGP extension at the end since the file is encrypted while processing.
- Owner: The username of the person who uploaded the document.
- Topic: The topic of the document. It is empty by default and can be added in Edit mode.
- File name: The original file name is in the field, it can be edited
- Availability: The access type defined by the user, which can be Permission-based or Open-sourced.
- Created: The date when the document was uploaded and processed on the platform.
- Modified: The date when the last changes were made to the document in Edit mode.
- Data Size: The size of the uploaded document.
- Core Entities: The platform generates and displays core entities based on the Knowledge Graph and data from the document.
- Pending Access Requests: The number of pending access permission requests. Defaults to zero if there are no requests.
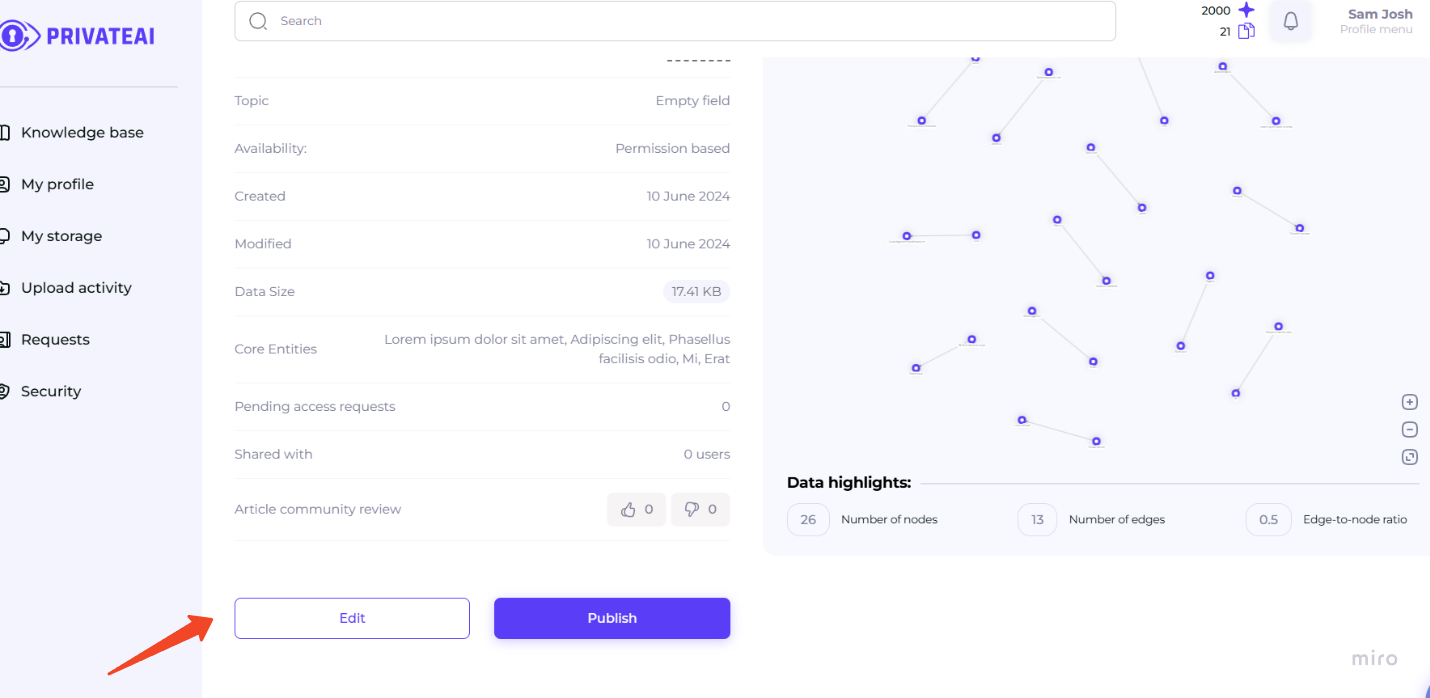
- Article Community Review: Displays the number of likes or dislikes the document has received from the community.
- Edit and Publish Buttons: Click Edit button to enter Edit mode and modify the document or click Publish button to publish any changes made to the document. Changes must be published to be captured in the Knowledge Base.
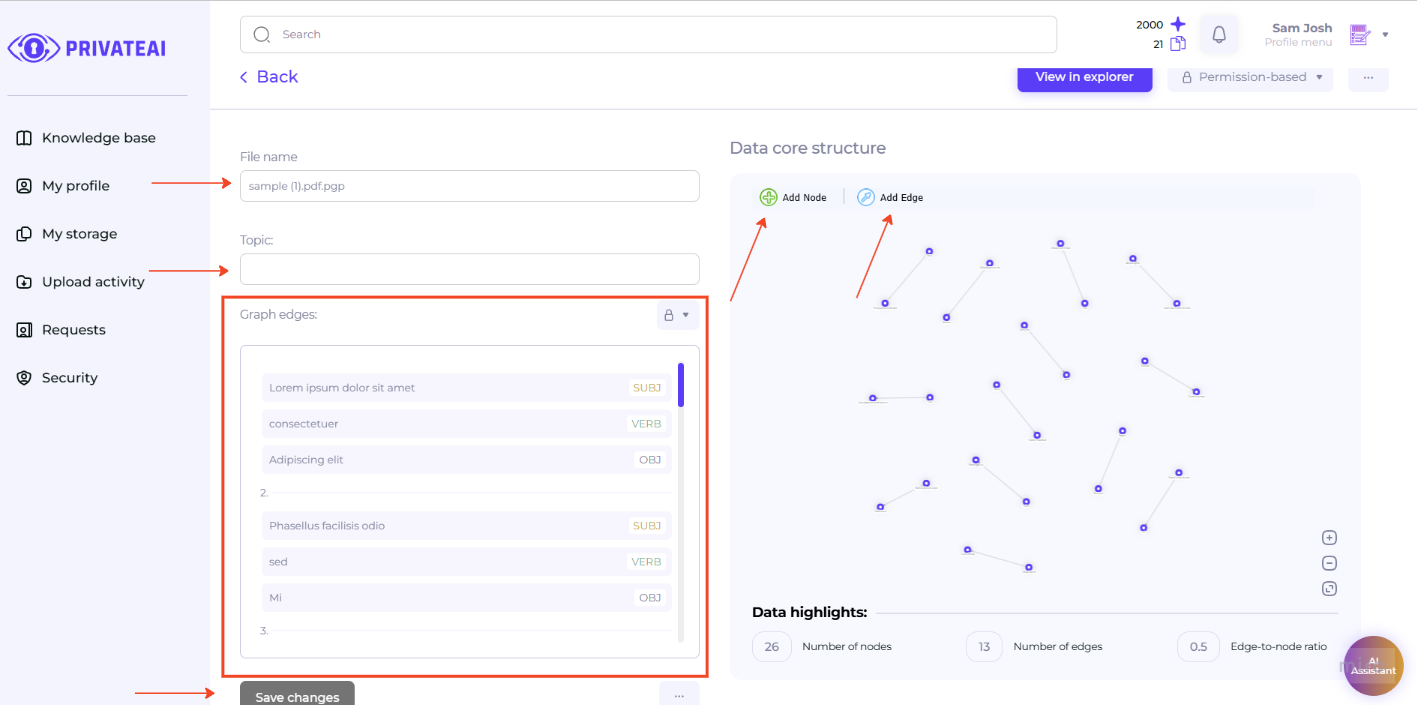
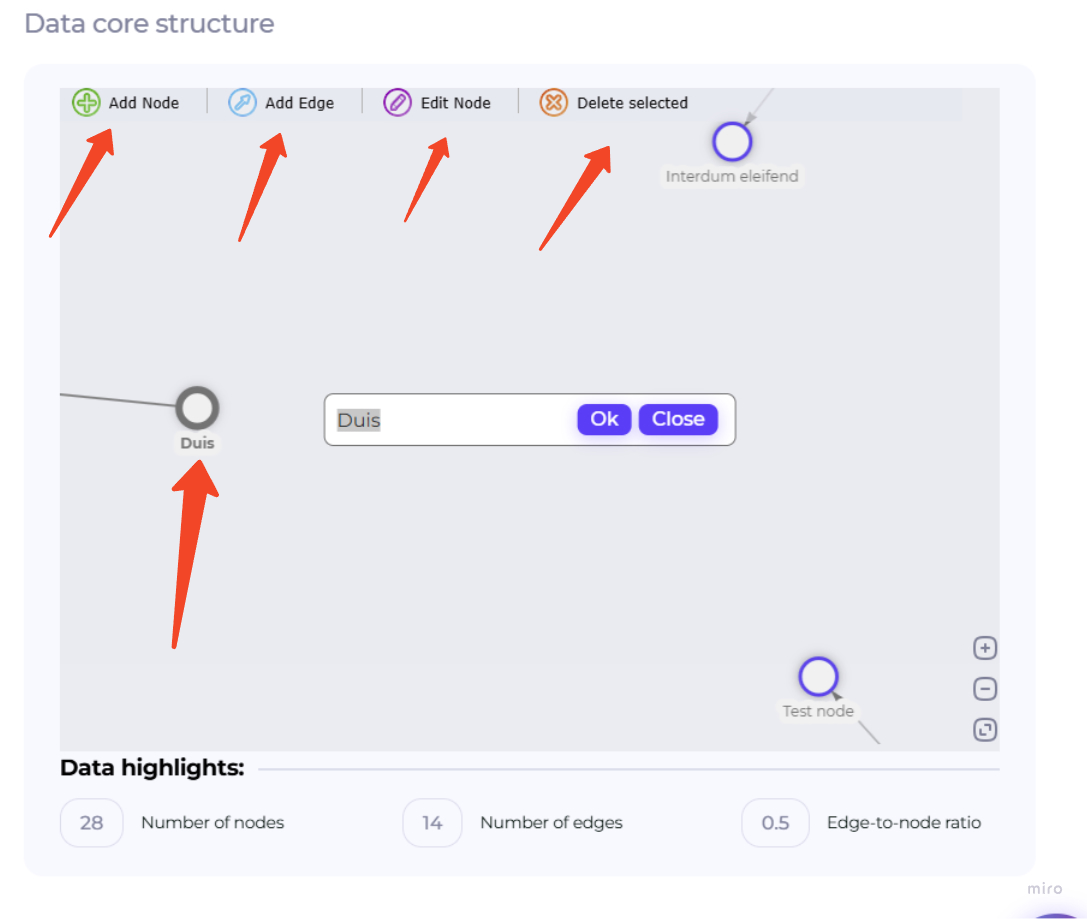
2. Data core structure
The data core structure section showcases the main part of the document on the platform:
- Knowledge Graph: A visual representation of the document's data with options to zoom in and out for better view and analysis. It can be also edited within your own document, the user is able to add node, edge and edit existing nodes or delete the selected existing node in the generated knowledge graph.
- Data Highlights Block:
1. Number of Nodes: The total number of nodes in the Knowledge Graph.
2. Number of Edges: The total number of edges in the Knowledge Graph.
3. Edge-to-Node Ratio: A metric showing the quality of the generated Knowledge Graph. A higher ratio indicates better quality.
3. AI assistant
The AI Assistant section is an important tool for interacting with the document:
- Positioned at the bottom right side of the document page.
- Represented by a circled button labeled "AI Assistant". Click on the button to ask questions related to the document.
AI Assistant can answer on the questions related to the selected document only, it has the list of predefined questions and the user can ask his or her own questions, if the answer is not found in the document or question is not related to the context of the document then AI Assistant informs the user about it. AI Assistant is available from the page of the document or from the record of the document in the Knowledge Base.
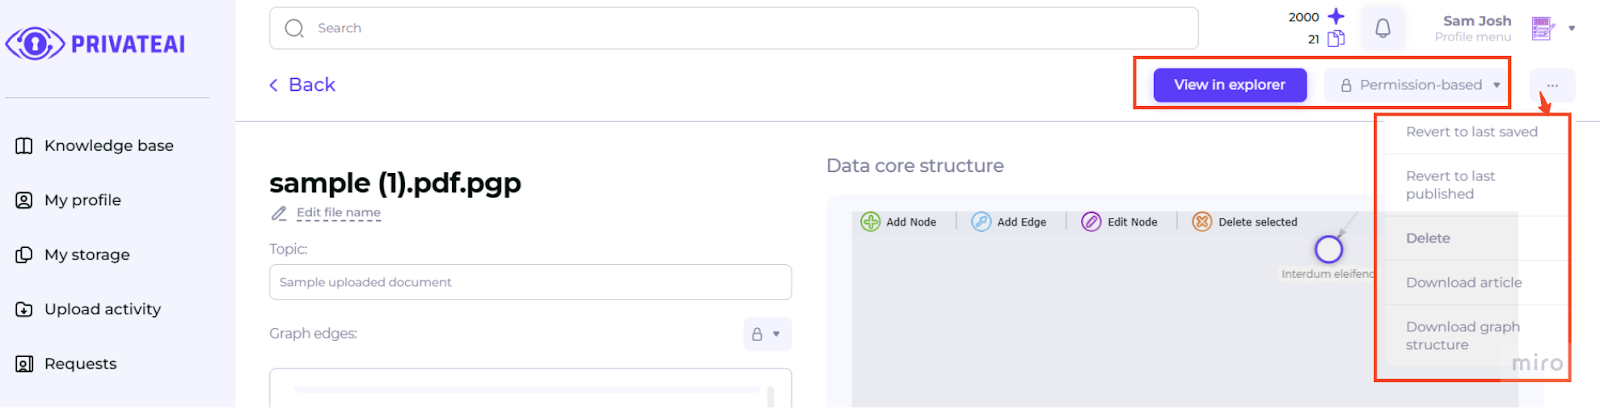
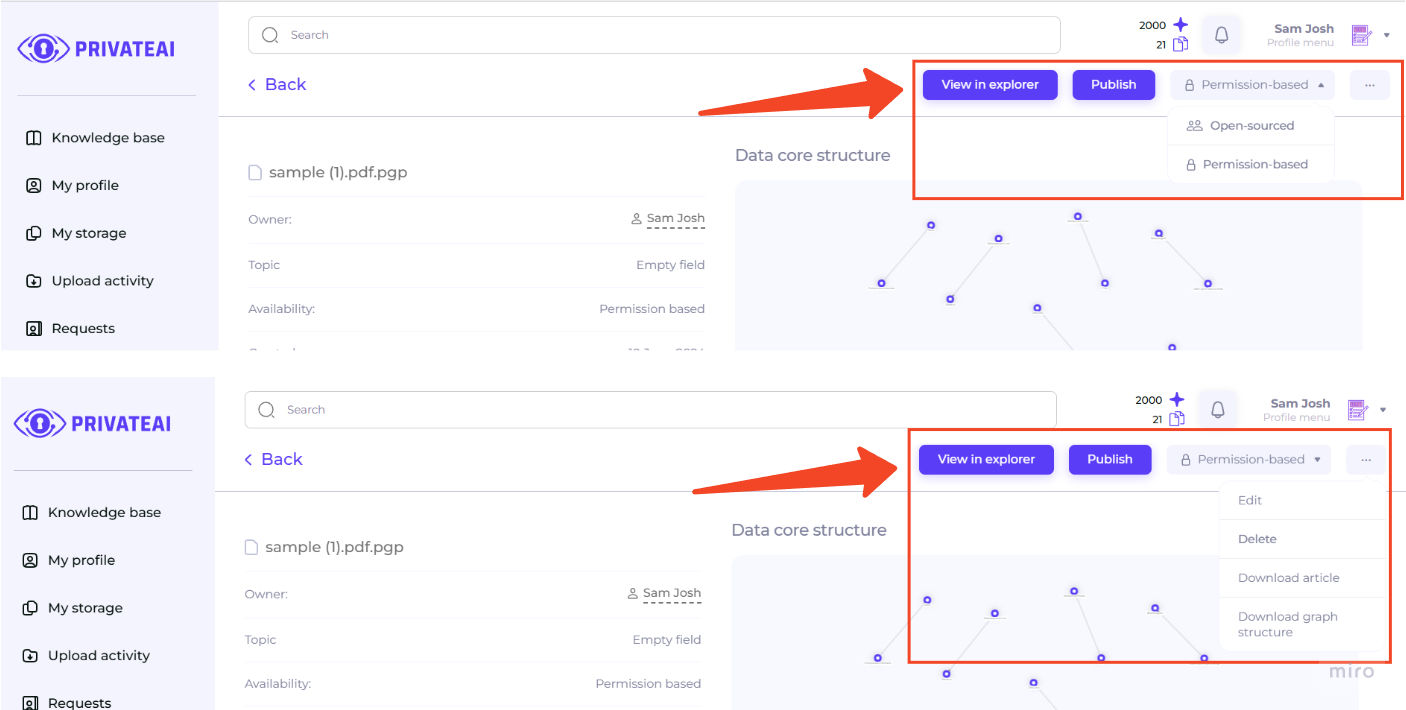
4. Top sub menu of document page
The top sub menu provides quick access to several important functions:
- Back Button: Returns the user to the My Storage section.
- Publish Button: Publishes any changes made to the document.
- Permission Button: A dropdown list with two options:
1. Permission-based: Restricts access to the document.
2. Open-sourced: Makes the document available to everyone. - Three Dots Button: A list of additional options:
1. Edit: Enters Edit mode for the document.
2. Delete: Deletes the uploaded document from the platform.
3. Download Article: Downloads the article in PDF format (requires signing with MetaMask).
4. Download Graph Structure: Downloads the table format of the knowledge graph in XLSX format.
In edit mode
In view mode
5. Comments
The Comments section allows users to view and interact with feedback on the document:
- Located at the bottom of the document page.
- Displays related comments and feedback left by users.
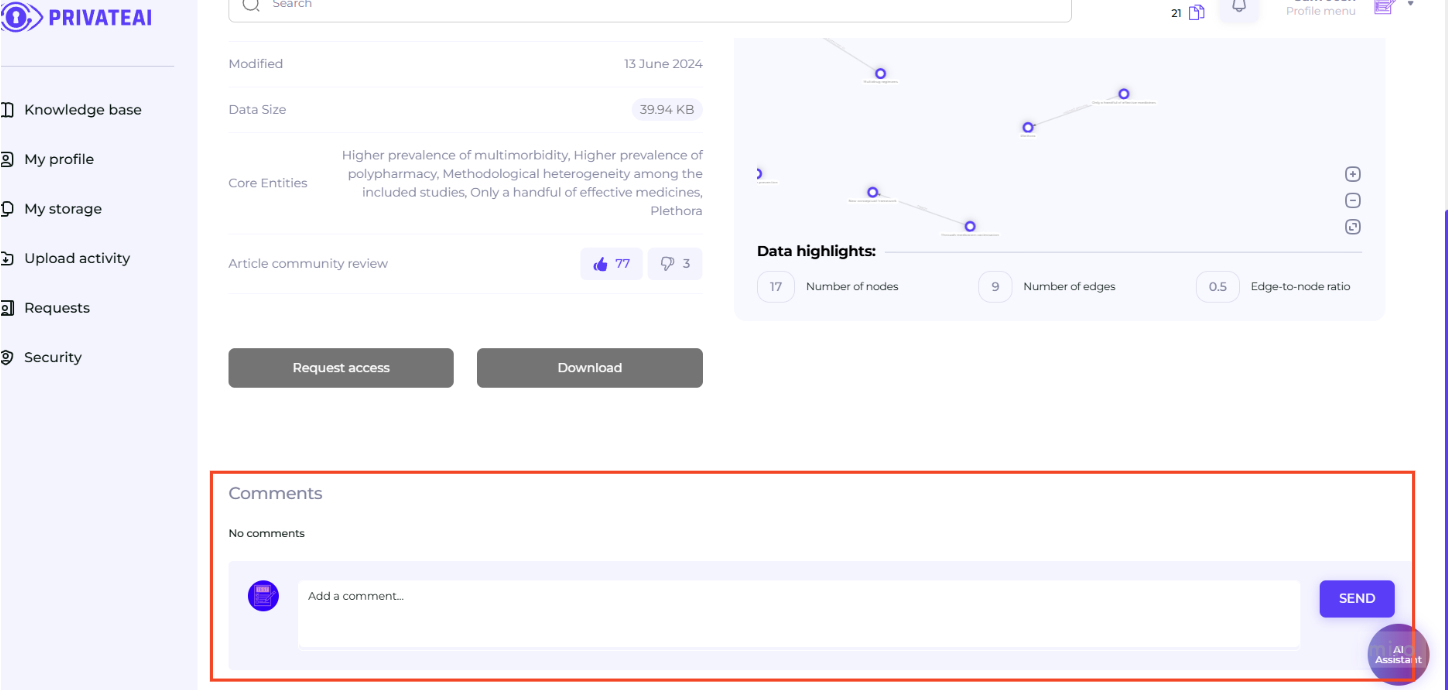
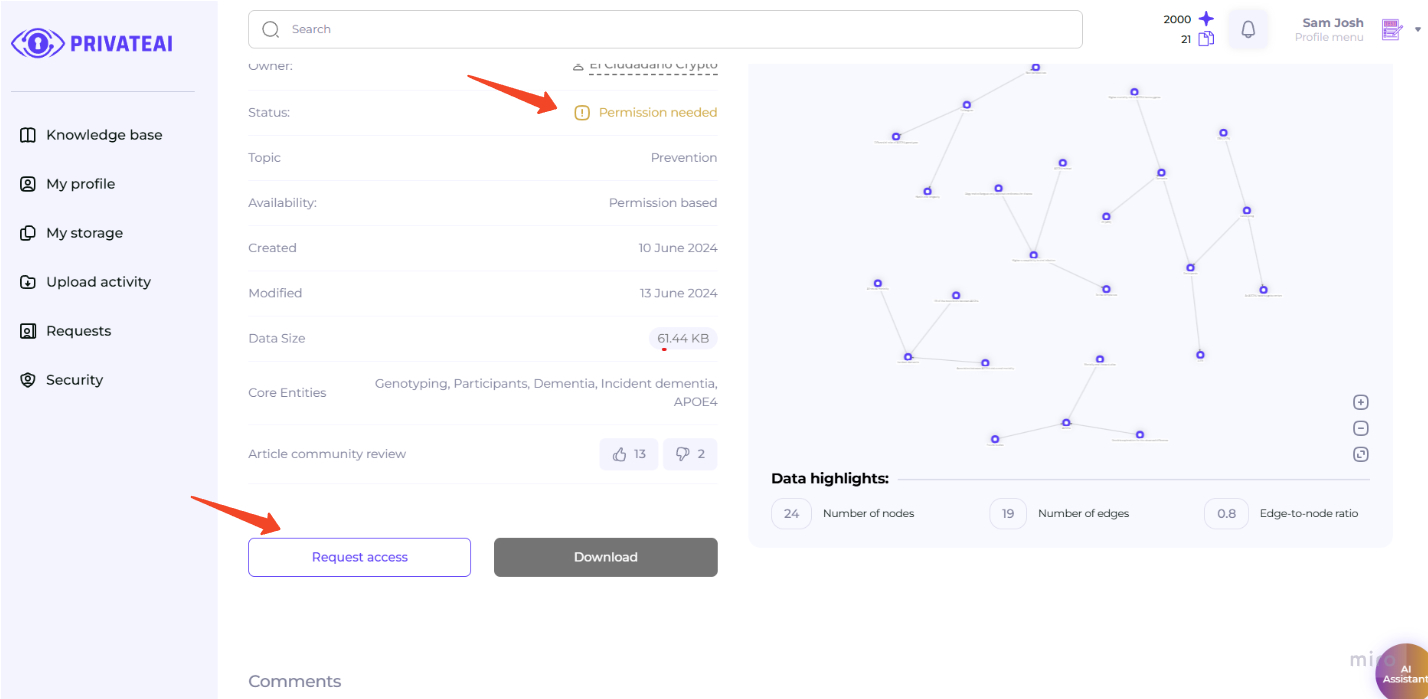
6. Requesting access
Users are able to request the access to the document with status Permission needed, if the status is Open sourced, then there is no need to request access.
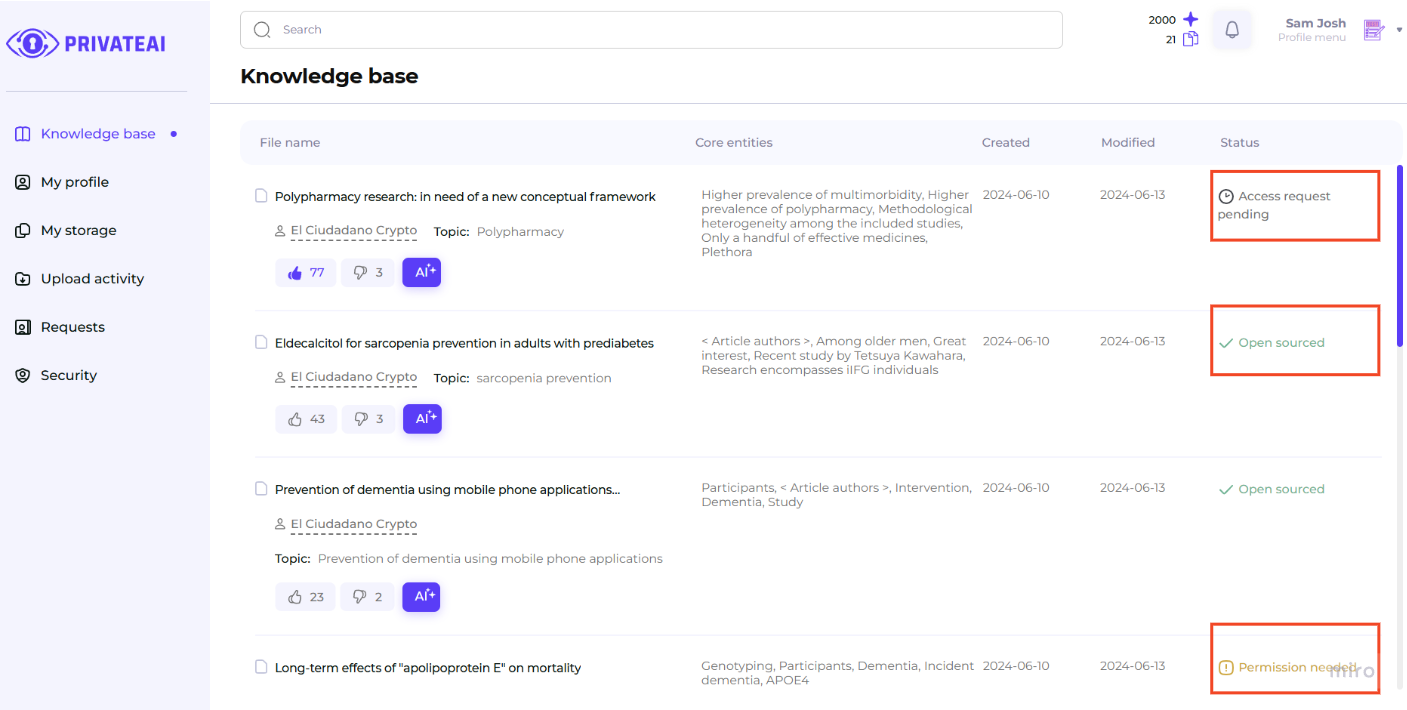
All requests to the users document can be found in Requests section of the platform
All requests made by user to the documents of the others can be found in My Storage in Requested Data tab